Rails Notes
So far we’ve been building one-off static webpages with HTML, CSS, and JavaScript. In this workshop, we’ll be building a real notes app!
Links to a live demo and the final code below. This workshop should take around 1 hour.
We’re using a programming language called Ruby, and a framework for building web apps called Ruby on Rails. (A framework makes specific tasks with a programming language easier by including code you’ll need so you don’t have to write it.)
A few quick terms you should know before we get started:
- Database: a place for computers to store data with fast searching. There are many kinds of databases, such as MySQL, Redis, MongoDB, SQLite, and ElasticSearch. We’ll be using PostgreSQL in this workshop.
- Backend: the side of the website that runs on the server, saving data to the database and returning webpages.
- Frontend: the side of the website written in HTML, CSS, and JS that users interact with.
- Request: a visit to a specific URL.
At the end, we’ll deploy the app by uploading the code to a service called Heroku, which runs servers for us without much configuration.
Getting set up
- Log in to Cloud9 and open your projects workspace.
- Install Ruby on Rails. Click on your bash terminal and run
gem install rails(always press return to run terminal commands). It will take a moment. - Let’s make our new project.
rails new notes --database postgresql
Great. Unfortunately there’s a bit of setup we have to do to get the database running.
-
Start up the database server.
sudo service postgresql start -
Create the database:
psql -c "create database notes_development owner=ubuntu" -
Open
notes/config/database.ymland replace thedevelopmentsection with this: (feel free to copy + paste)development: adapter: postgresql encoding: SQL_ASCII database: notes_development pool: 5 username: ubuntu password: password -
We’re making changes to our setup, so back in our terminal, let’s commit to Git:
git add --allgit commit -m "Start Notes project"
-
Connect the Rails app to its database. We’ll need to run this command from inside our new application’s directory (folder), so run
cd notes. Then:rails db:migrate
Finally, let’s start our app’s server. Open a new terminal tab (click the ⨁ icon and New Terminal). Again, this needs to be inside the Rails app, so cd notes. Now: rails s -b $IP -p $PORT
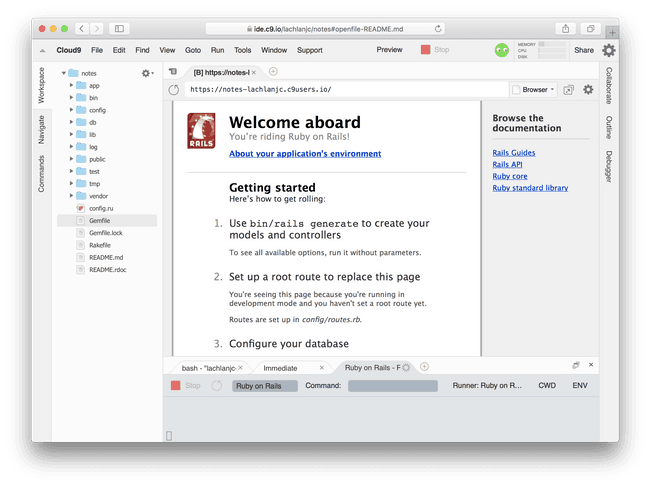
Click Preview, then Preview Running Application button to see your app so far:
Yay! You’re on Rails! You’ve installed Rails, made a new app, started and set up a database server, created a database, and started the application server. Nice job.
How Rails works
We’ll get to building in just a moment! First, a quick intro on Rails.
Rails runs on your server, sitting between incoming requests and your code. It’s what’s called Model-View-Controller (MVC) framework:
A Model is a structured piece of data. A site like Facebook might have models for Post and Comment. In this notes app, Note is the model. Models have attributes (think form fields), such as name or content.
A View is the content of an actual webpage, like the HTML we’ve been writing. In Rails, your view files will not end with .html, but .html.erb. This is embedded Ruby: you can embed Ruby code in your webpage using special HTML tags:
<h1><%= note.name %></h1>
<div><%= note.content %></div>
A Controller connects requests (like for the /notes page) to your view, usually referencing a model. A Controller has (typically several) actions, which are different ways to interact with the Note. Here are the standard pages:
- index — like your
index.htmlfile. This page usually lists all the items (like notes), from which you can tap to open one individually. URL:/notes - show – a page for an individual item (like a note), shown in full detail. URL:
/notes/1 - new – a page with a form for creating a new record. URL:
/notes/new - edit – a page for editing a specific record. URL:
/notes/1/edit
Consider an incoming request for /notes in our app. The basic lifecycle of the request is like this:
- Router. The Rails router determines what page the user is looking for. These routes are defined in
config/routes.rb. - Controller. The routes reference controllers, like the
NotesController, and a specific action inside that controller (in this case,index). Any setup code for that action is run, such as fetching theNoteobjects from the database. - View. Finally, Rails renders the view HTML for that controller action. This file is located at
app/views/notes/index.html.erb.
That was a lot to take in! Don’t worry if you don’t understand it all. Let’s write some code and you’ll see where each of these pieces fit in.
Start your app
We’re building an app for keeping notes. We’ll need a Note model, the NotesController so we can see our notes in our browser, and views for our controller to render. That’s a lot to write, but Rails can help out!
Return to the first tab in your terminal (the one in which your server is not running) and run this command: rails generate scaffold Note name:text content:text
Wow! That’s a lot of things. What did we just do?
- We used a Rails “generator”, which creates and fills in a bunch of files so we don’t have to.
- We generated a “scaffold”, which includes a model, controller, views, and a few other things.
- We made a model called
Notethat has two attributes,nameandcontent. Both of these attributes are of typetext(you could also usenumber,datetime, etc).
Before seeing what Rails has put together, run rails db:migrate again. This will set up the Note model in the database.
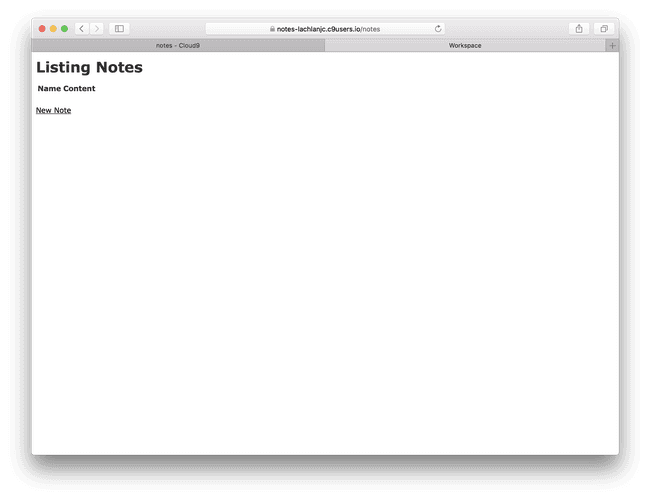
In your Preview, add notes to the end of the URL box, so it says https://projects-yourname.c9users.io/notes, and press enter.
Here’s your basic app! Click on “New Note”, write in the boxes, and submit the form with the “Create Note” button. Your note has been saved in the database! Click “Back” and you’ll see it in your note list. Pretty cool, right? You can edit your note or destroy (delete) it, and add more notes.
It’s not required, but poke around and read some of the files Rails wrote for you. What’s in your model (app/models/note.rb)? What about your controller (app/controllers/notes_controller.rb)? The views (app/views/notes/index.html.erb, app/views/notes/show.html.erb)? Read some of the code, even if you can’t yet understand it all.
Customizing your app
While our Notes app has some good functionality, it’s not very fun to use. Let’s customize it! Here are a few things you can easily change—it’s all up to you.
- Root page. Open
config/routes.rband add a root URL, like this:
Rails.application.routes.draw do
  root 'notes#index'
  resources :notes
end- The page title. You may have noticed your views aren’t complete HTML files: they’re just what goes inside the
<body>…</body>HTML. There’s a template for this atapp/views/layouts/application.html.erb. Try a new title (like Awesome Notes) by changing what’s inside<title>…</title>on line 4! When your refresh the page in the Preview, you’ll see the new title. - The notification messages. After creating a new note, saving changes to a note, or deleting a note, a message notifies the user they were successful. Open
app/controllers/notes_controller.rband change the text inside the quotes likenotice: 'Note was…'text (see line 31), like We’ve saved your awesome note!. Next time you run a request of that type, you’ll see your new message. - Styling! You already have some experience writing CSS! Open up
app/assets/stylesheets/scaffolds.scssand make some changes. On lines 19-21 you’ll find the CSS setting the color of links (HTML<a>tags). Change#000to your favorite color, likecornflowerblueortomato.
When you’re done, commit to Git.
cd ..(changes directory to the parent directory, where your Git repository is)git add --all(adds all the new files to Git)git commit -am "Add notes"(commits the changes)cd notes(returns to the application directory)
Deploying
- Create an account on Heroku, a service for deploying apps.
-
We’ll need to install Heroku’s tools on our command line.
sudo add-apt-repository "deb https://cli-assets.heroku.com/branches/stable/apt ./"curl -L https://cli-assets.heroku.com/apt/release.key | sudo apt-key add -sudo apt-get update && sudo apt-get install heroku —yes
- Log in to your Heroku account:
heroku login -
Create a new Heroku app:
heroku create(or, if you want to use a custom name,heroku create notes-MYNAME)- Copy the URL there. When we deploy, your app will be there.
- Deploy!
git push heroku master - Run the database migration:
heroku run rails db:migrate
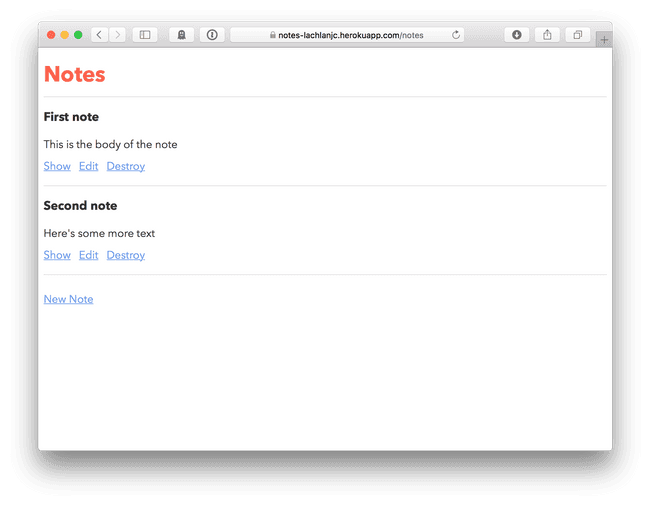
Now, open the URL you copied in a new tab. Your app is live! Anyone can publish notes on your new website.
If you want, show it off on Slack’s #shipit channel 🙂
Finally, and push your work today to GitHub:
cd ..(back to the parent directory)git push origin master
How was this workshop?
(your feedback is anonymous + appreciated 💚)


