GitHub Pages
Launch your website with GitHub's free hosting. Created by @sethtrei.
GitHub Pages Workshop
This workshop has been retired and is no longer maintained or recommended.
Welcome! In this workshop you will set up a GitHub Pages Website!
To start you need to have completed the Cloud 9 Workshop.
What is GitHub Pages?
GitHub Pages is a way of using a GitHub repository to make a website. By the end of the workshop you will have a link to get you to your website.
What is a Repository?
A repository is a location (or folder) where code and other files can be
stored. The word repository is sometimes shortened to repo.
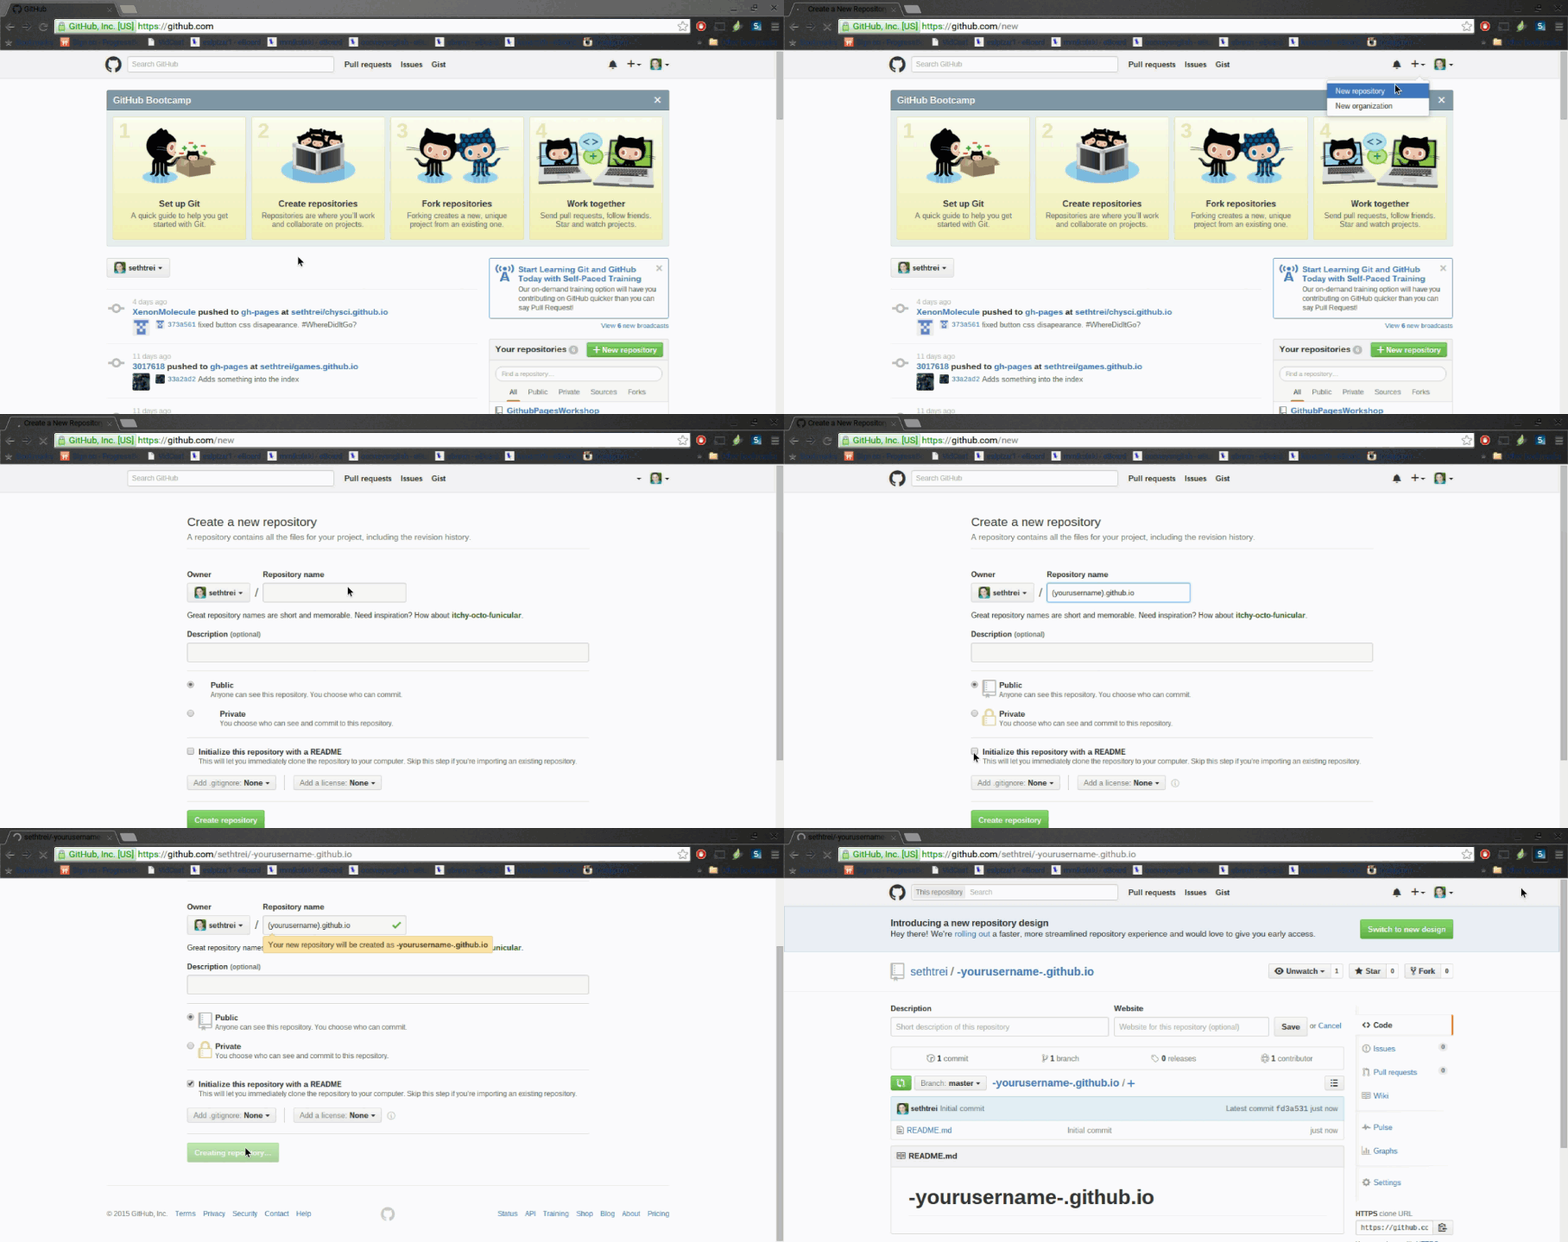
Create a Repository
Make a repository following this format:
(yourusername).github.ioSo if your username is supersam, your repository would be supersam.github.io.
Clone into Cloud9
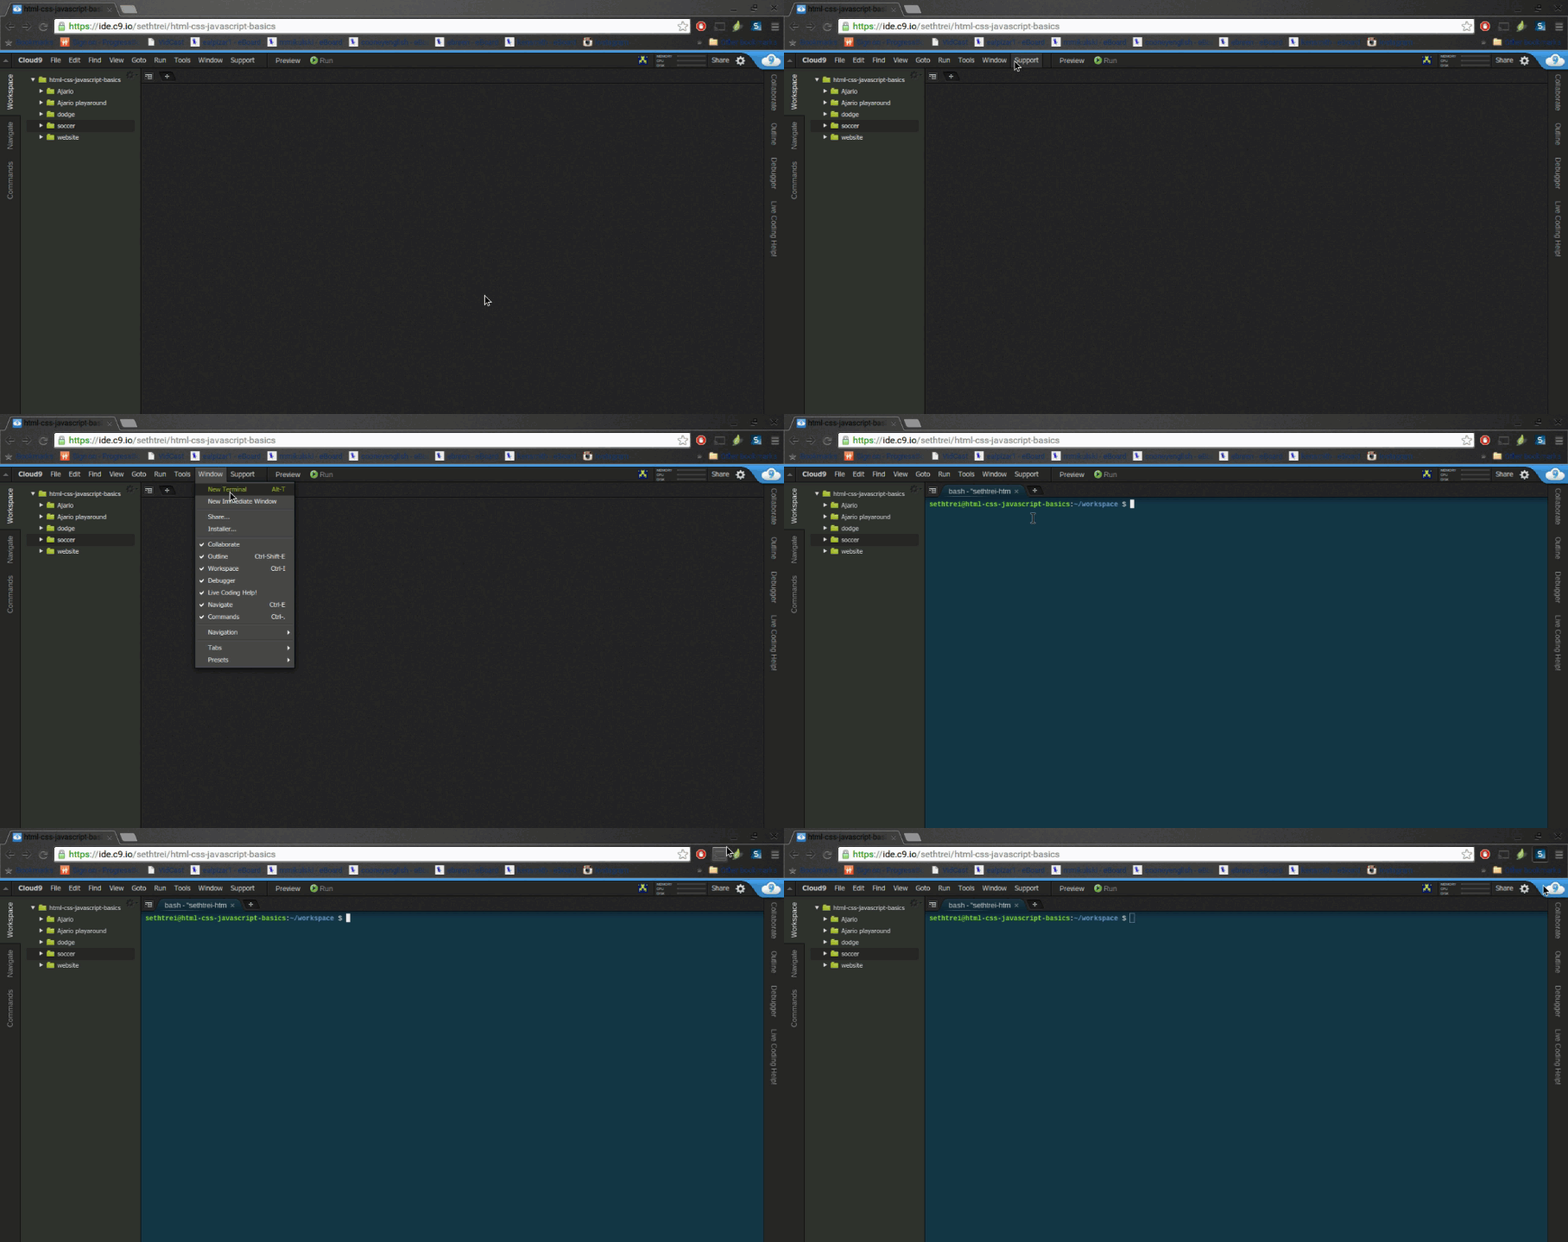
Go into your Cloud9 workspace and choose an area to clone your repository. You want to find the terminal that starts with “bash”. If it isn’t there open a new terminal. (Instructions directly below)
Now that we have a place to put our code, we want to set up a way to edit our code.
-
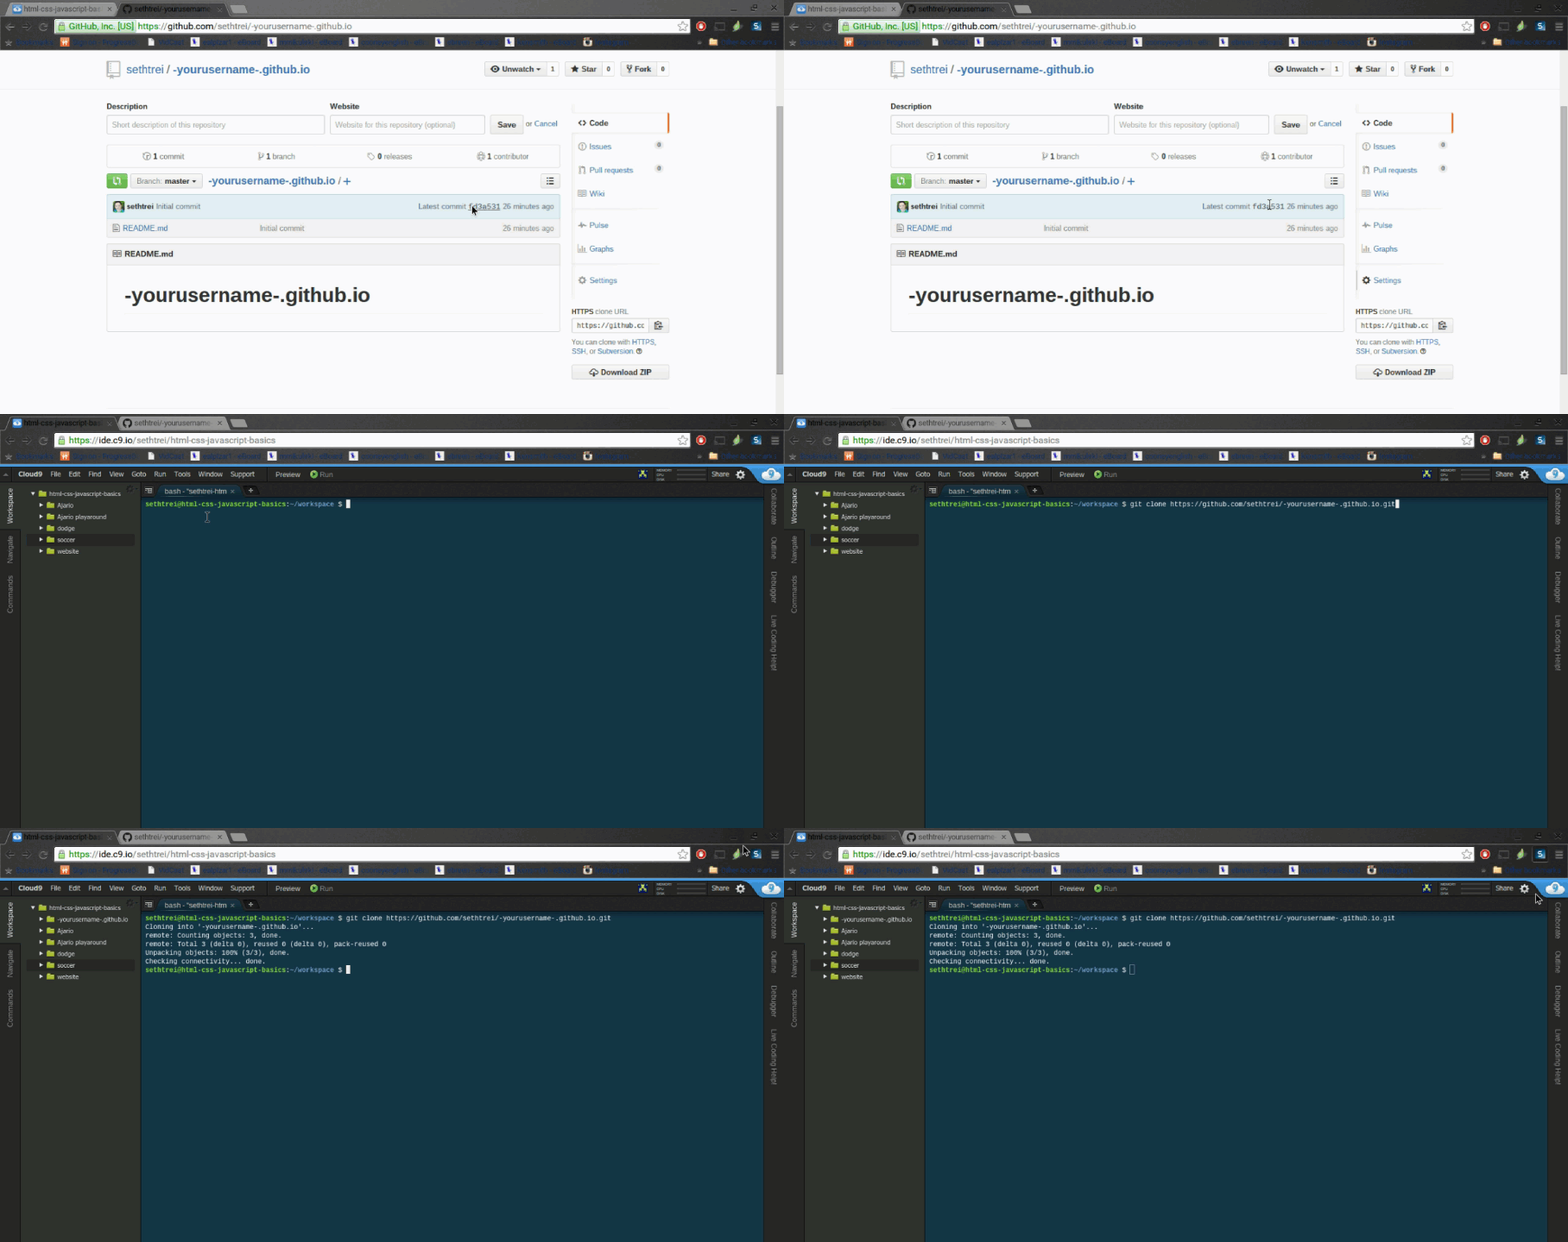
Get the link for cloning. It is on the right side of your repository. If you click the little icon, the link is now on your clipboard.
-
Go into your Cloud9 workspace and open a new terminal (Alt+T, or Window > New Terminal).

-
In the terminal type:
git clone [then the link you just copied]
Congrats! You can now edit and save in your repository!
You should start creating the necessary files for a website. (index.html,
style.css, etc)
Part 2
In this part of the workshop, you will learn how to sync your Cloud9 data into your GitHub Repository.
Committing and Publishing to GitHub
In this part of the workshop, you will learn how to put the code from Cloud9 into your GitHub repository.
Committing and Publishing to GitHub
After you make changes to your site on Cloud9 you will need to put the changes on GitHub for the changes to show up on your site.
-
Switch into your repo in the terminal
cd [repository name] -
Add your changes to the commit list by doing…
git add . -
Commit your changes with the following format
git commit -m "Here you type what the commit does. Keep the quotations."This will get your changes ready to push to GitHub
-
Push your changes
git pushIt will ask for your username and password. Note: When you type your password it wont show up in the terminal.
Let’s Explain What you Just Did
You just used git to push your repository on Cloud9 to your repository on GitHub.
GitHub and git?
Git is a tool for organizing the files in your repository, as well as moving your repository between Cloud9 and GitHub. Because Git is only controlled through the terminal, GitHub is a website that provides a user interface for git (buttons and pictures instead of just text).
So what is the URL?
The URL to your website is the same name as your repository so it should be
[username].github.io.
Done!
Congrats! Now you can share the URL to anyone!
How was this workshop?
(your feedback is anonymous + appreciated 💚)

